Posted on

Pigeons for manure, eggs, and meat

Pigeon program

Pigeon manure
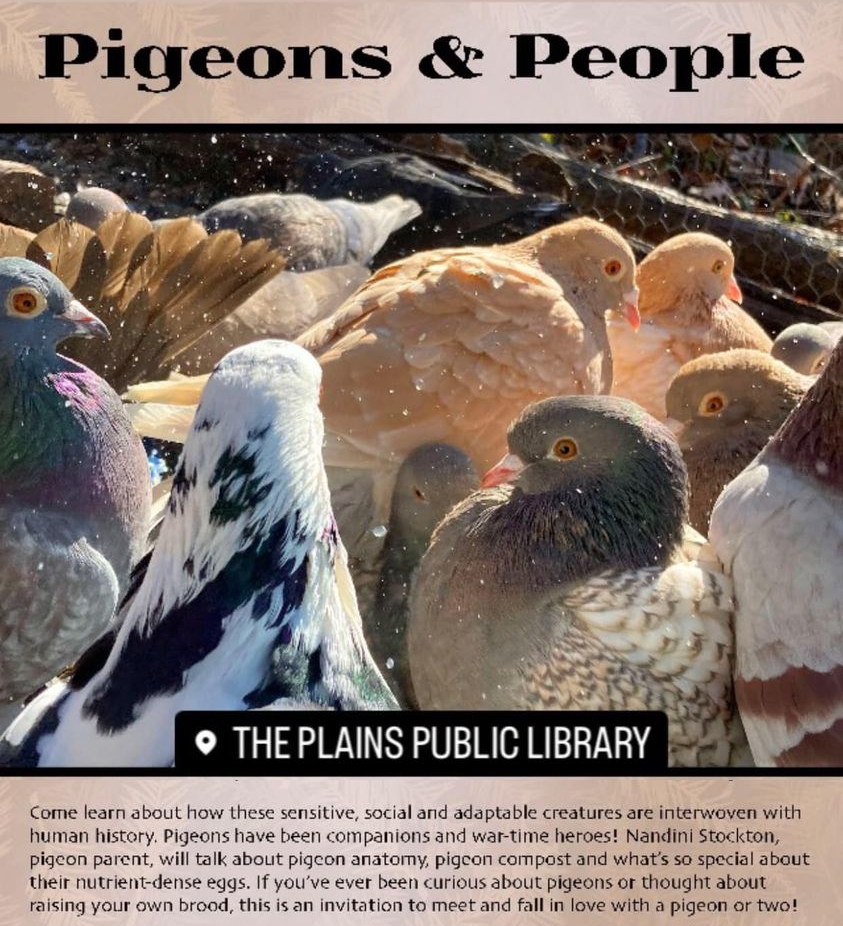
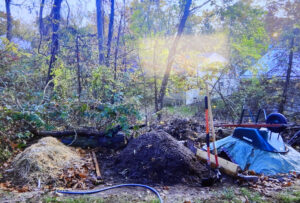
When I saw the above teaser of a library program, I was instantly hooked by the reference to pigeon compost. And the photo Nandini Stockton shared of her manure piles was definitely intriguing. But are the feed costs and work worth the output?

To answer that question, I had to listen to the entire (wonderful presentation), the cream of which I’m including below.


Eating pigeon eggs

Cooking a pigeon egg
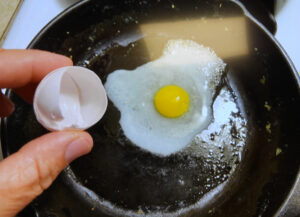
In addition to manure, pigeons on the homestead are a source of what Nandini referred to as a superfood. Despite their diminutive size, she claimed each pigeon egg contains as many calories as a chicken egg. I couldn’t fact-check this easily on the internet, but did find an article mentioning pigeon eggs’ protein levels, which are higher ounce-per-ounce than chicken eggs.

The downside of raising pigeons for eggs is volume, and not just volume of individual eggs either. Unlike chickens, you can’t keep ten female pigeons with no males around and expect eggs, and they don’t lay every day either. Instead, you need a mated pair of pigeons and each pair only produces four eggs per month. No wonder pigeon eggs are considered a high-dollar delicacy!


Homestead pigonRaising pigeons for meat

The other homestead use for pigeons is meat. Nandini didn’t talk about this much since she clearly considers her pigeons pets. But she did mention that there are specific varieties of pigeons better suited to being used as meat birds. Squabs are often killed at thirty days, right around the time they fledge.


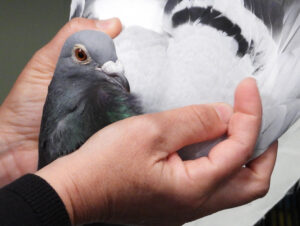
Keeping pigeons on the homestead

So what kind of infrastructure do you need to keep pigeons? The coop (better known as a loft) is a bit like a chicken coop and it usually has at least a small aviary attached. Wood pellets are optimal bedding and pigeons are fed a mixture of grains. They also need special Pigeon coop
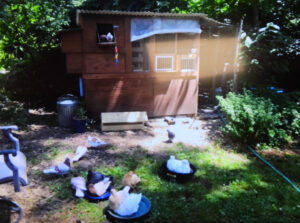
waterers with reservoirs at least 3/4 of an inch deep (but which the pigeons can’t poop in, of course).

Nandini keeps her pigeons entirely cooped up from early September to mid April since, otherwise, Cooper’s Hawks chow down on her flock far too easily. Starting in April (or whenever leaves are back on the trees to provide cover), she lets her pigeons out in the mid afternoon. They fly around, forage, and bathe in basins of water she places on the lawn before returning inside for the night.

I asked whether free-flying pigeons bother her garden, and she said they didn’t. But she also noted that her loft is located on the opposite side of her yard from her vegetables. She does plant sedums for her flock closer to their loft, which likely keeps them close to home.


Are we getting pigeons?

Mark says no. After sleeping on it, I decided he was right — an extra worm bin would result in just as good compost at a fraction of the hassle. But if you end up getting pigeons (or already have a flock), I hope you’ll comment and let me know what you think of them as homestead livestock!

Posted on

Tips for early spring peas

Soaking pea seeds

Planting pea seeds thick

Peas don’t like heat, so it’s a good idea to plant them as early as possible. But if you plant too early, you’ll end up with only a couple of survivors spread across a large trellis, wasting precious garden space. What’s the solution?

Early-planted peas can do well, but you need to stack the deck for success. First, soak your pea seeds inside for at least four hours, during which time they’ll plump up and wake up. You can actually keep them inside until they sprout, but you’ll want to pour off the water after twelve hours or so and cover the seeds with a humidity dome if you go that route. Sprouted peas also need to be handled more carefully to prevent the tender new roots from breaking, so I usually just do the four-hour-plumping-up soak.

Next, out in the garden, ignore the instructions that pea seeds should be spaced one to three inches apart. Instead, drop them into a furrow in dense clumps before covering them up.

Protecting pea seedlings from critters(Of course, it goes without saying that you waited until the soil was at least 35 degrees Fahrenheit, planned for rain to keep the seedlings growing fast, and didn’t plant just before an extended cold snap.)

Finally, find some way to protect your pea seedlings from critters. The same sprouts that are delicious on our table are also a favorite of rabbits and other garden invaders. We use caterpillar tunnels over our spring pea beds, keeping the enclosure in place until the plants are tall enough to need a trellis.

After all that, it’s time to wait and hope. Fingers crossed for a copious, early crop!

Posted on

Should I plant peas on Valentine’s Day?

(Short answer — probably not.)

But who wants a short answer when you can read an Appalachian anecdote?

Where I grew up, the rule of thumb was to plant lettuce on Groundhog’s Day and peas on Valentine’s Day. Which makes very little scientific sense (even if you ignore the fact that I now live in a different USDA hardiness zone).

After all, what early spring crops are looking for is moist soil that’s not too cold. And February weather is so variable that a date perfect on some years is bound to be terrible on others.

So, yes, I definitely recommend you pull out a soil thermometer rather than planting by the calendar. But there’s also a fun alternative (at least for lettuce).

Wintersowing lettuce

Last year, I meant to collect seeds from my lettuce bed, so I let the plants bolt and bloom. Unfortunately, it rained then stayed wet while the seeds were maturing. Rather than fighting the damp, I shrugged and figured I’d order my lettuce seeds next time around.

But when I went out to take a look at the spot at the end of January, there were already tiny lettuce seedlings poking up out of the earth! A soil thermometer would have given me data on whether the soil was warm enough right at that moment, but those overwintering seeds assure me that the average had been at least 35 degrees Fahrenheit for long enough to tempt overwintering lettuce to sprout.

Peas need about five more degrees of warmth than lettuce, so while I could plant some now I’m going to wait a little longer. (Pea seeds are also very tasty to critters, so unlike lettuce they’re not a good choice for wintersowing.) To soothe my itchy green thumb and commemorate Valentine’s Day, I’ll start a flat of broccoli inside instead.

Posted on

Hex head drill bits

These new hex head allen wrench bits are miles ahead of the old L shaped wrenches.

They slide right into any impact driver with a 1/4 inch quick connect or the same size hand driver.

A nice bonus is these are magnetic to help you hold whatever bolt or screw you’re working with.

Posted on

Turning old pea seeds into yummy winter sprouts

Are you itching for homegrown vegetables, but your garden soil temperature is still far too cold to start any new crops? Did you buy too many pea seeds last year and aren’t sure whether the holdovers have enough vitality to germinate in chilly soil?

Why not solve two problems at once by sprouting some pea seeds indoors?

Choosing seeds to sprout

Soaking pea seeds

First a note on choosing seeds — I always buy untreated pea seeds and those are the only type I’d use to grow pea sprouts for the table. If you’re not sure whether your peas are treated, shake some out of the packet. Are they pink? Treated! Are they tan or pale green? Untreated!

The next step is related. Treated seeds are engineered to be less likely to rot while they slowly soak up enough water to germinate. The way to bypass this issue when using untreated seeds is to soak the seeds overnight or until they plump up and lose their wrinkles. Even though you’ll be sprouting your seeds inside where rotting is less likely, you might as well soak your seeds.

Setting up your sprouting trays

Growing pea sprouts

The next question is — what should you plant your pea seeds into?

I was experimenting and didn’t want to commit to an entire flat to pea seedlings, so I dug into the recycling bin for potting containers. Clamshells from the grocery store are great since they have drainage holes in the bottom and a lid you can close to keep the soil surface damp during germination.

I tried out two depths of clamshells and highly recommend you choose the deepest tray possible. A 1.5-inch tray barely gave us two cuttings of sprouts while a 3.5-inch tray gave us at least three. (More on that later.)

Once you’ve chosen your planting container, fill it up with potting soil, then spread the soaked seeds in a layer along the top. I packed them in so the seeds were touching, which maximized the planting space.

Harvesting pea sprouts

Cut pea sprouts above the bottom leaf.

Now it’s a waiting game. Once your peas send up shoots that are multiple inches long, cut each sprout just above the bottom leaf.

The photo above shows a pea plant at its second cutting. Notice how it resprouted from the same point (which it will do again and again). Don’t cut below all the leaves, though, or you’ll only get a single harvest!

How many harvests to expect

Harvesting pea sprouts

Our first harvest was small (but tasty!). The photo above shows the total yield from both planting containers.

Growing pea sprouts indoors Homegrown pea sprouts

The second and third cuttings were larger. The images here show the plants and their yield after the third cutting.

After that, I realized I’d made a bit of a mistake. Our pea plants kept sending out new shoots even though I hadn’t put them in a window or under artificial lighting, so I figured they were fine in low light. But after the third cutting, it became clear that the seeds had used up all of their stored energy.

Which is a long way of saying, harvest four from the deep pot was scanty. Harvest four from the shallow pot was nonexistent and a lot of the plants died all the way back.

I put the deeper pot on a windowsill after that and am hoping we’ll see enough growth to get a fifth harvest. But even if this is the end, sprouting leftover pea seeds was definitely a low-work and nearly free way to add something fresh to our winter diet. (Plus, greenery inside in January makes me smile.)


Posted on

Kindling splitter update

We’ve had our Kindling Splitter for over 2 years now and it continues to make kindling safe and easy.

It seems to help to cut your pieces a few inches higher than the height of the splitter.

Cutting shorter pieces runs the risk of the hammer contacting the splitter and dulling the edge.

A few minutes with an angle grinder is all it takes to bring it back to its full cutting potential.

Posted on

How and why to start a pit garden

On our first homestead, ground water was so high in certain areas that we had to build extra-tall mounds just to prevent plant roots from drowning. On our current ridge, the problem is the exact opposite and I hope the solution is the opposite too.


Pit garden
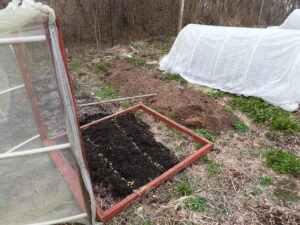
What’s a pit garden?

A pit garden is simply a garden bed located below the natural level of the surrounding earth. The idea is to concentrate and hold onto moisture, both groundwater and runoff from the surrounding terrain.

Alternatively, if you locate your pit garden where it gets runoff from your roof, you’ve created a rain garden. Whether a rain garden will rot roots depends on your climate and what you plant. But if you’re on a dry ridgetop like we are, it might be just the ticket!


How to know if you need a pit garden

Does your ground dry up and crack at least once a year? Do you irrigate and still lose shallow-rooted perennials like blueberries? Do volunteer vegetables come up in your mulched aisles more than in the good soil of your raised beds? Do broadcast-seeded plants germinate fitfully in the middle of your beds but better around the (lower-down) edges?

If any or all of these field marks sound familiar — try a pit garden (or rain garden, or both)!


Gardener digging a trenchHow to build a pit garden
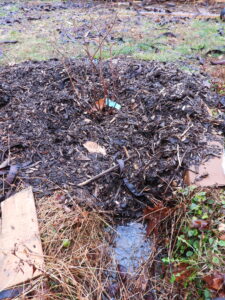
Dig a trench then backfill it most of the way with excellent soil (putting the old subsoil somewhere else). Your goal is to have any mulch hit right at the natural elevation of the surrounding earth.

Next, plant and enjoy the result!

(By the way, the diagrams in this post are courtesy of Midjourney…who doesn’t seem to understand what either a shovel or a spade is. My correction: dig your trench with a spade, not whatever that gardener has in his hand…)


Pit gardenWhat we did

In our case, we’d dug the beginnings of a foundation for a wood-stove-room addition. Then (as usually happens with me), I lost interest in putting time and energy into house when I could put the same time and energy into outdoors and plants

So I moved acidified soil from our blueberry patch into our premade pit garden. Next, I transplanted a cranberry and a few blueberries that had barely been hanging on in the main garden into that good, low earth.

Our spot is definitely a rain garden in addition to a pit garden, and in some very wet years the trench used to hold enough water for tadpoles to mature. (You can see what it looks like after a sixth of an inch of rain in the photo.) I’ll report back and let you know if that’s too much water or just right for our ericaceous crops.


Anna Hess in a rock mazeWinter break

In other news, we’re taking a bit of a winter break while Mark heals up a back injury and I stick to the basics to keep the homestead running and myself sane. I’ll tell you about our edible-seed-sprouting experiments and more when life smooths out again.

If you miss hearing from us while you wait, why not check out our gardening video courses or deep-dive into gardening topics with our books?

Posted on

Third-generation hybrid hazels

Cracked hazelnuts

Hazelnuts have a lot of potential as a low-work garden plant, but blights make straight-up European hazelnuts problematic in the eastern United States. Luckily, various institutions have been experimenting with combining the disease-hardiness of American hazelnuts with the productivity of European hazelnuts over the last decade, and we jumped on the bandwagon very early on.


Our previous hazel experiments

Walden Effect hybrid hazel experiments

I used Google to search through our old posts to refresh my memory, and they actually got the facts right. But what’s most relevant to this post is:

Which brings us to…


A new hope

Male flower buds on hybrid hazel bushes

Hybrid hazel bush
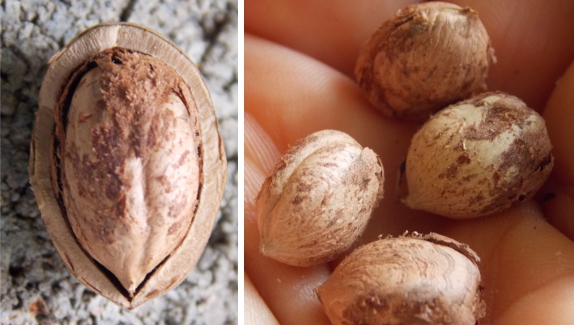
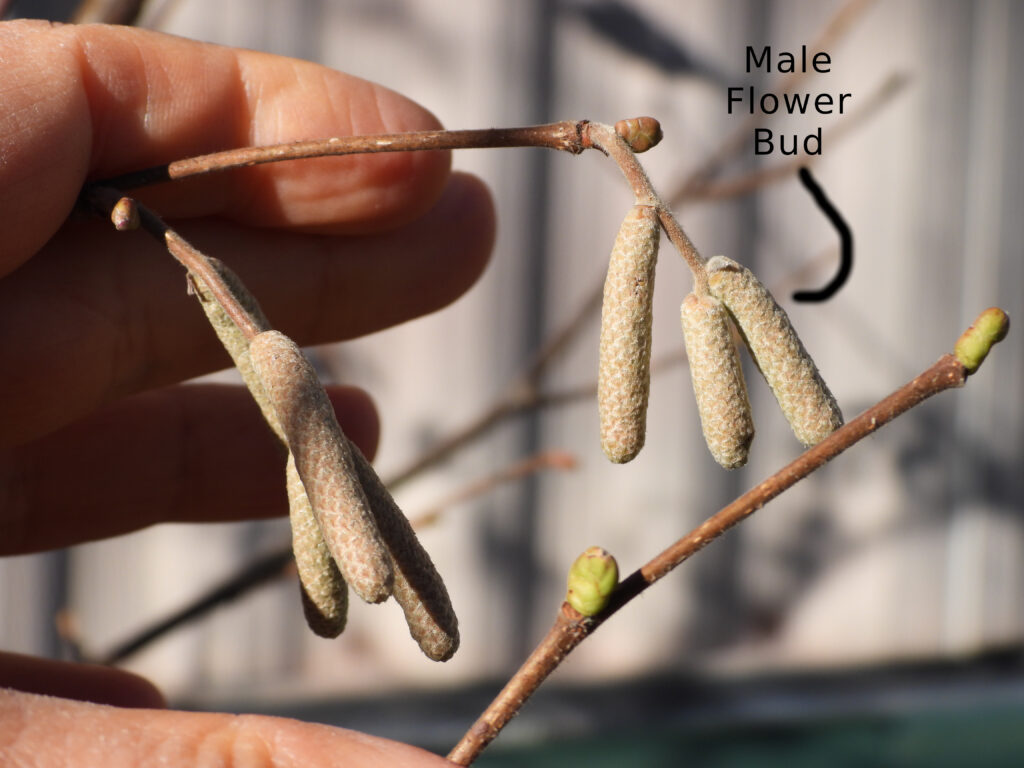
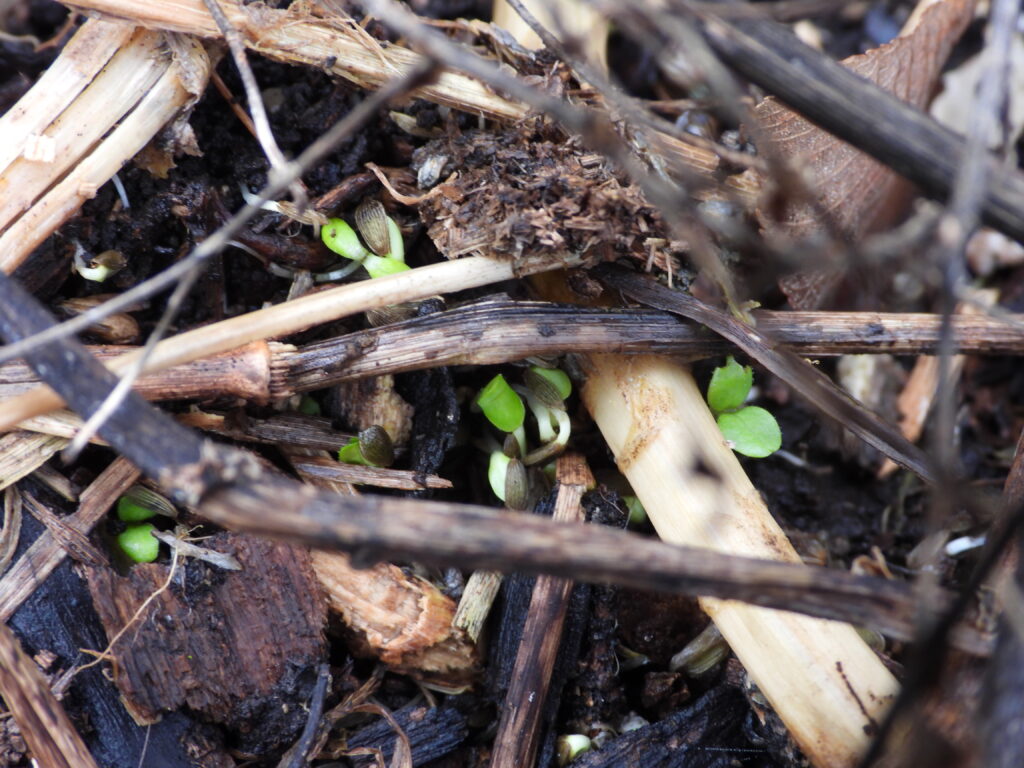
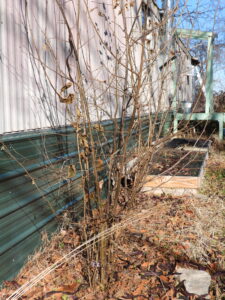
In April 2020, we planted two hybrid hazel bushes here in Ohio: Yamhill and Dorris, both from Burnt Ridge Nursery. As expected, both have grown well with very minimal attention — I think I’ve kill-mulched under them every other year. Both are shaping up to look much more like European hazelnuts (tall and less bushy) than like American hazelnuts (shorter and with lots and lots of trunks). But what about the nuts?

Many plants with separate male and female flowers start out male only as they mature since it’s a lot less work to produce pollen than fruit. Sure enough, in spring of this year (2023), the Yamhill produced its first male flowers. Now, the Dorris is following suit while the Yamhill is completely coated in both male and (I think) female flower buds.

So it looks like 2024 will be the test! Do these more carefully selected hybrid hazels produce nuts with shells thin enough so I don’t have to pull out my hammer? Stay tuned for a taste test this coming fall!