Posted on

Inoculating mushroom logs with sawdust spawn

We’ve written in the past about our mushroom experiments, which mostly centered around using plug spawn in logs. So I was thrilled when our local library offered an opportunity to try something a little different — sawdust spawn.

(Yes, we do have the best library around. Yes, they did let us take home an inoculated shiitake log of our very own.)


Pros and cons of sawdust spawn

Newly inoculated mushroom log

Sawdust inoculation tool

As best I can tell, the only real downside of using sawdust spawn is that you need to buy an inoculation tool. At $45 per tool, that means sawdust spawn makes the most sense for folks who intend to inoculate at least 36 logs (although you don’t have to do them all at once, of course). My math in today’s dollars:

  • Sawdust spawn: about $1 per log in spawn cost
  • Plug spawn: about $2.25 per log in spawn cost

In addition to long-term price savings, other benefits of using sawdust spawn include:

  • Your logs will produce mushrooms faster (in 5 to 12 months instead of 9 to 18 months).
  • I actually found inoculation with the sawdust tool gentler on my wrists (no hammering!).


Other inoculation innovations

Measuring mushroom log hole locations

Other than the inoculation tool, using sawdust spawn is pretty much the same as using plug spawn. But I thought you might enjoy seeing our teachers’ entire process since it is definitely better than ours!

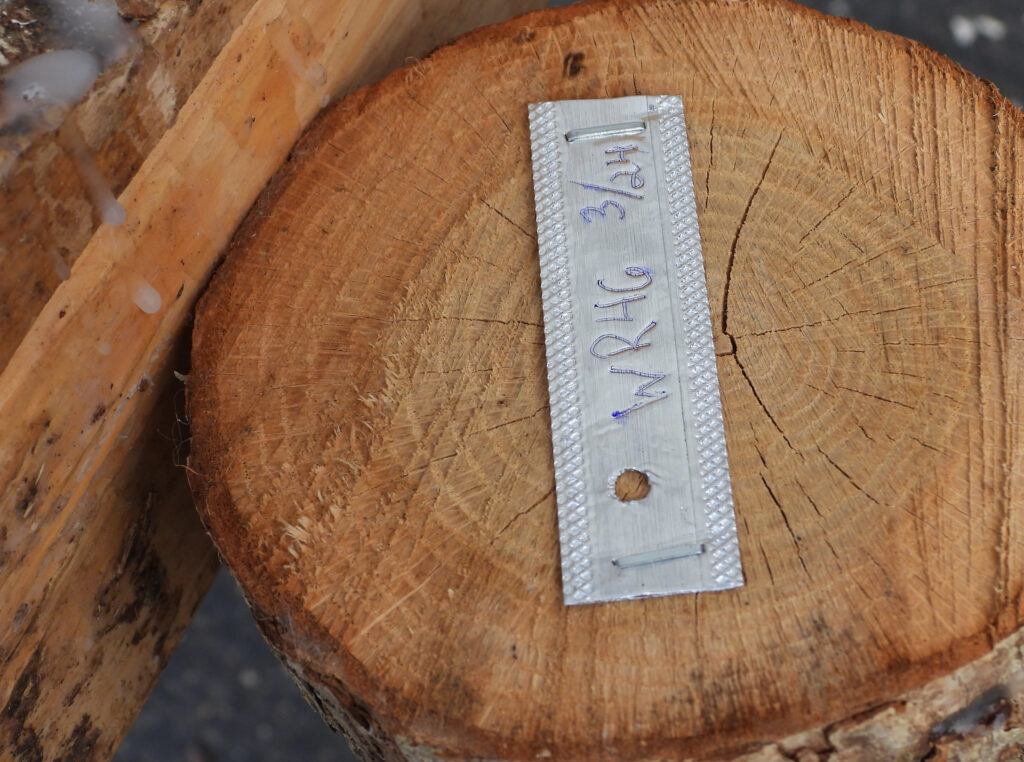
First the infrastructure: They built tables with little wooden cradles at intervals to hold the logs in place. That means the only time you really need a second set of hands is when drilling the holes.

Also note the measuring stick with the spacing information on it. No laborious hand-measuring each log!

Drilling holes in a mushroom log with an angle grinder

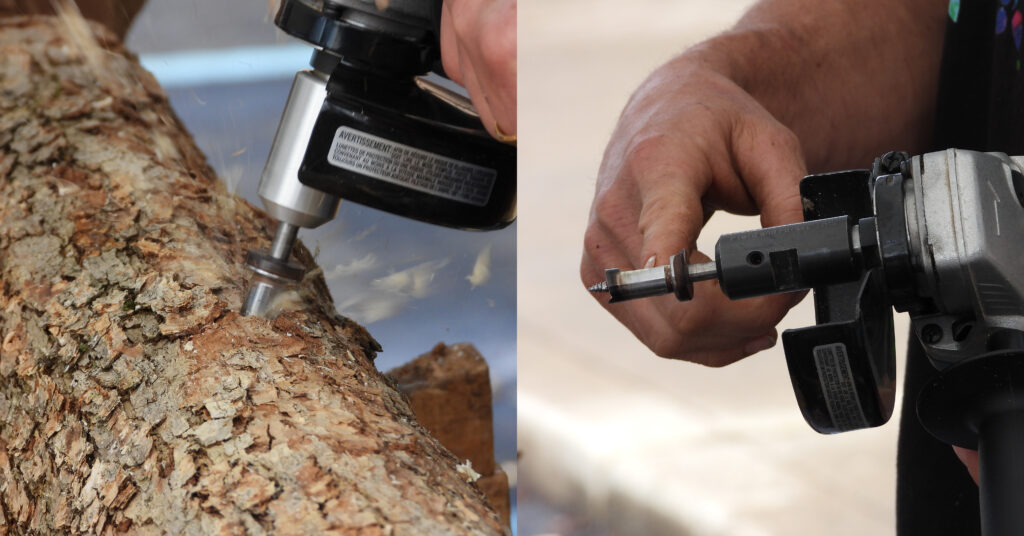
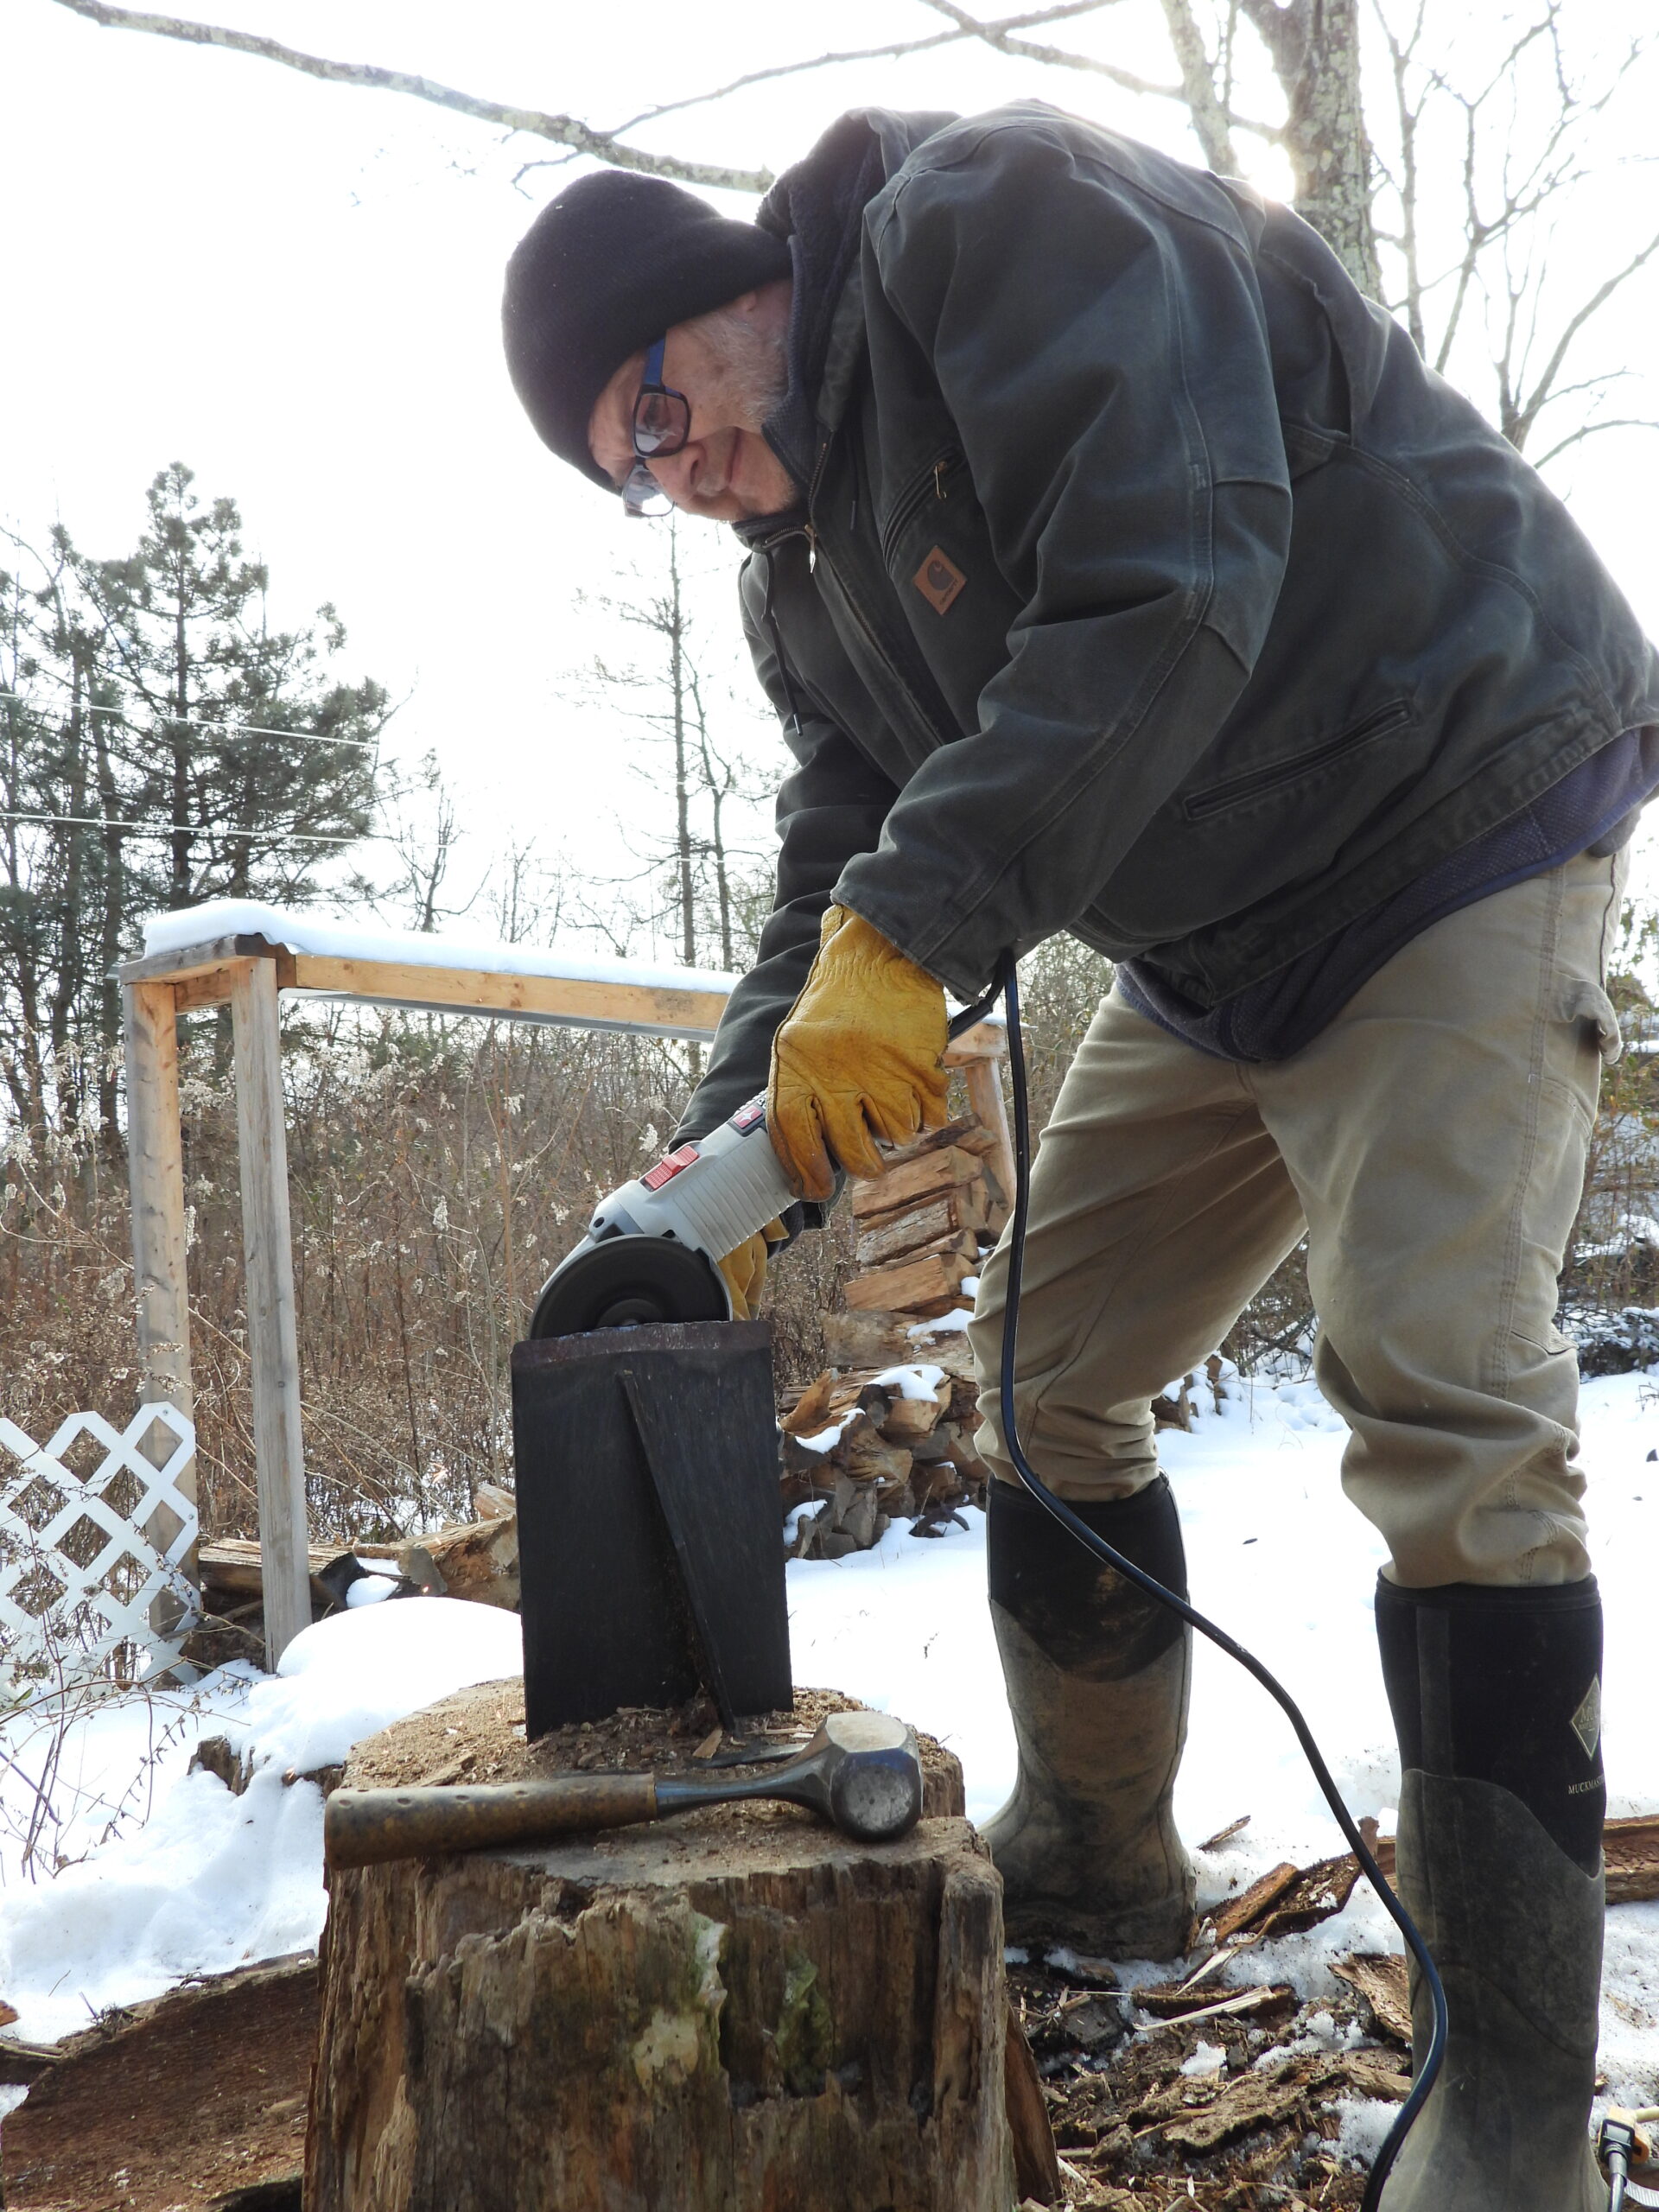
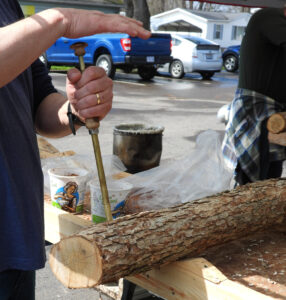
Another innovation is the use of an angle grinder rather than a drill gun. Mark shared a video in which you can see how much faster this is than what we’d done in the past.

(Do be careful though. I could see someone drilling through their hand with this setup.)

Shiitake sawdust spawn

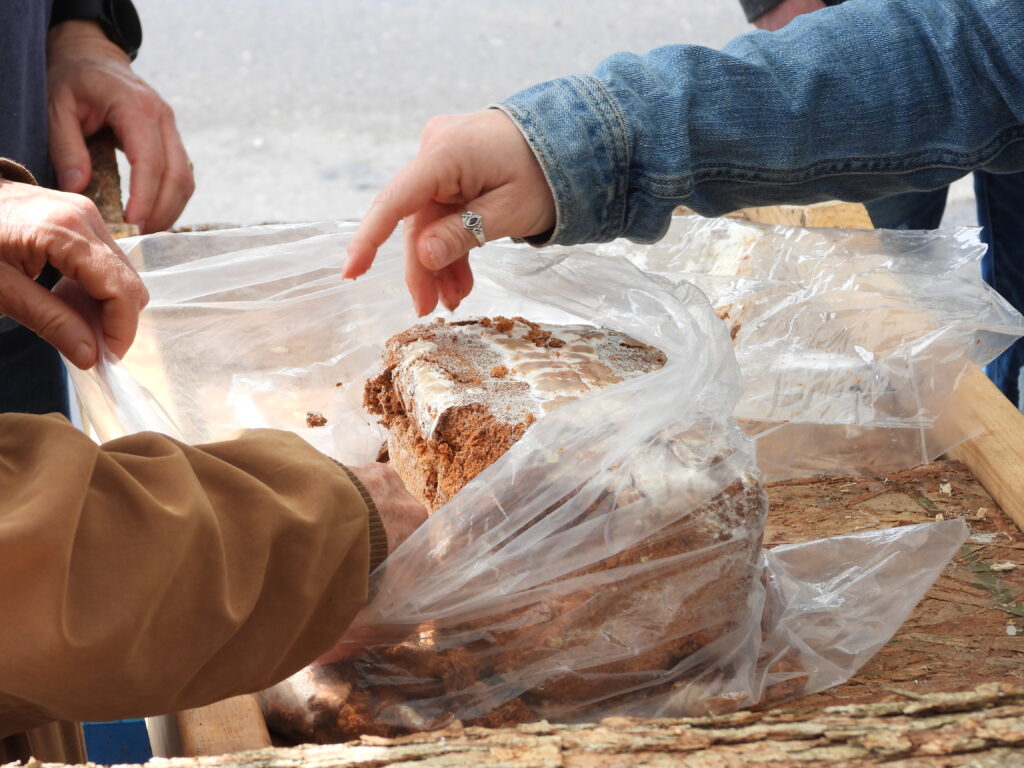
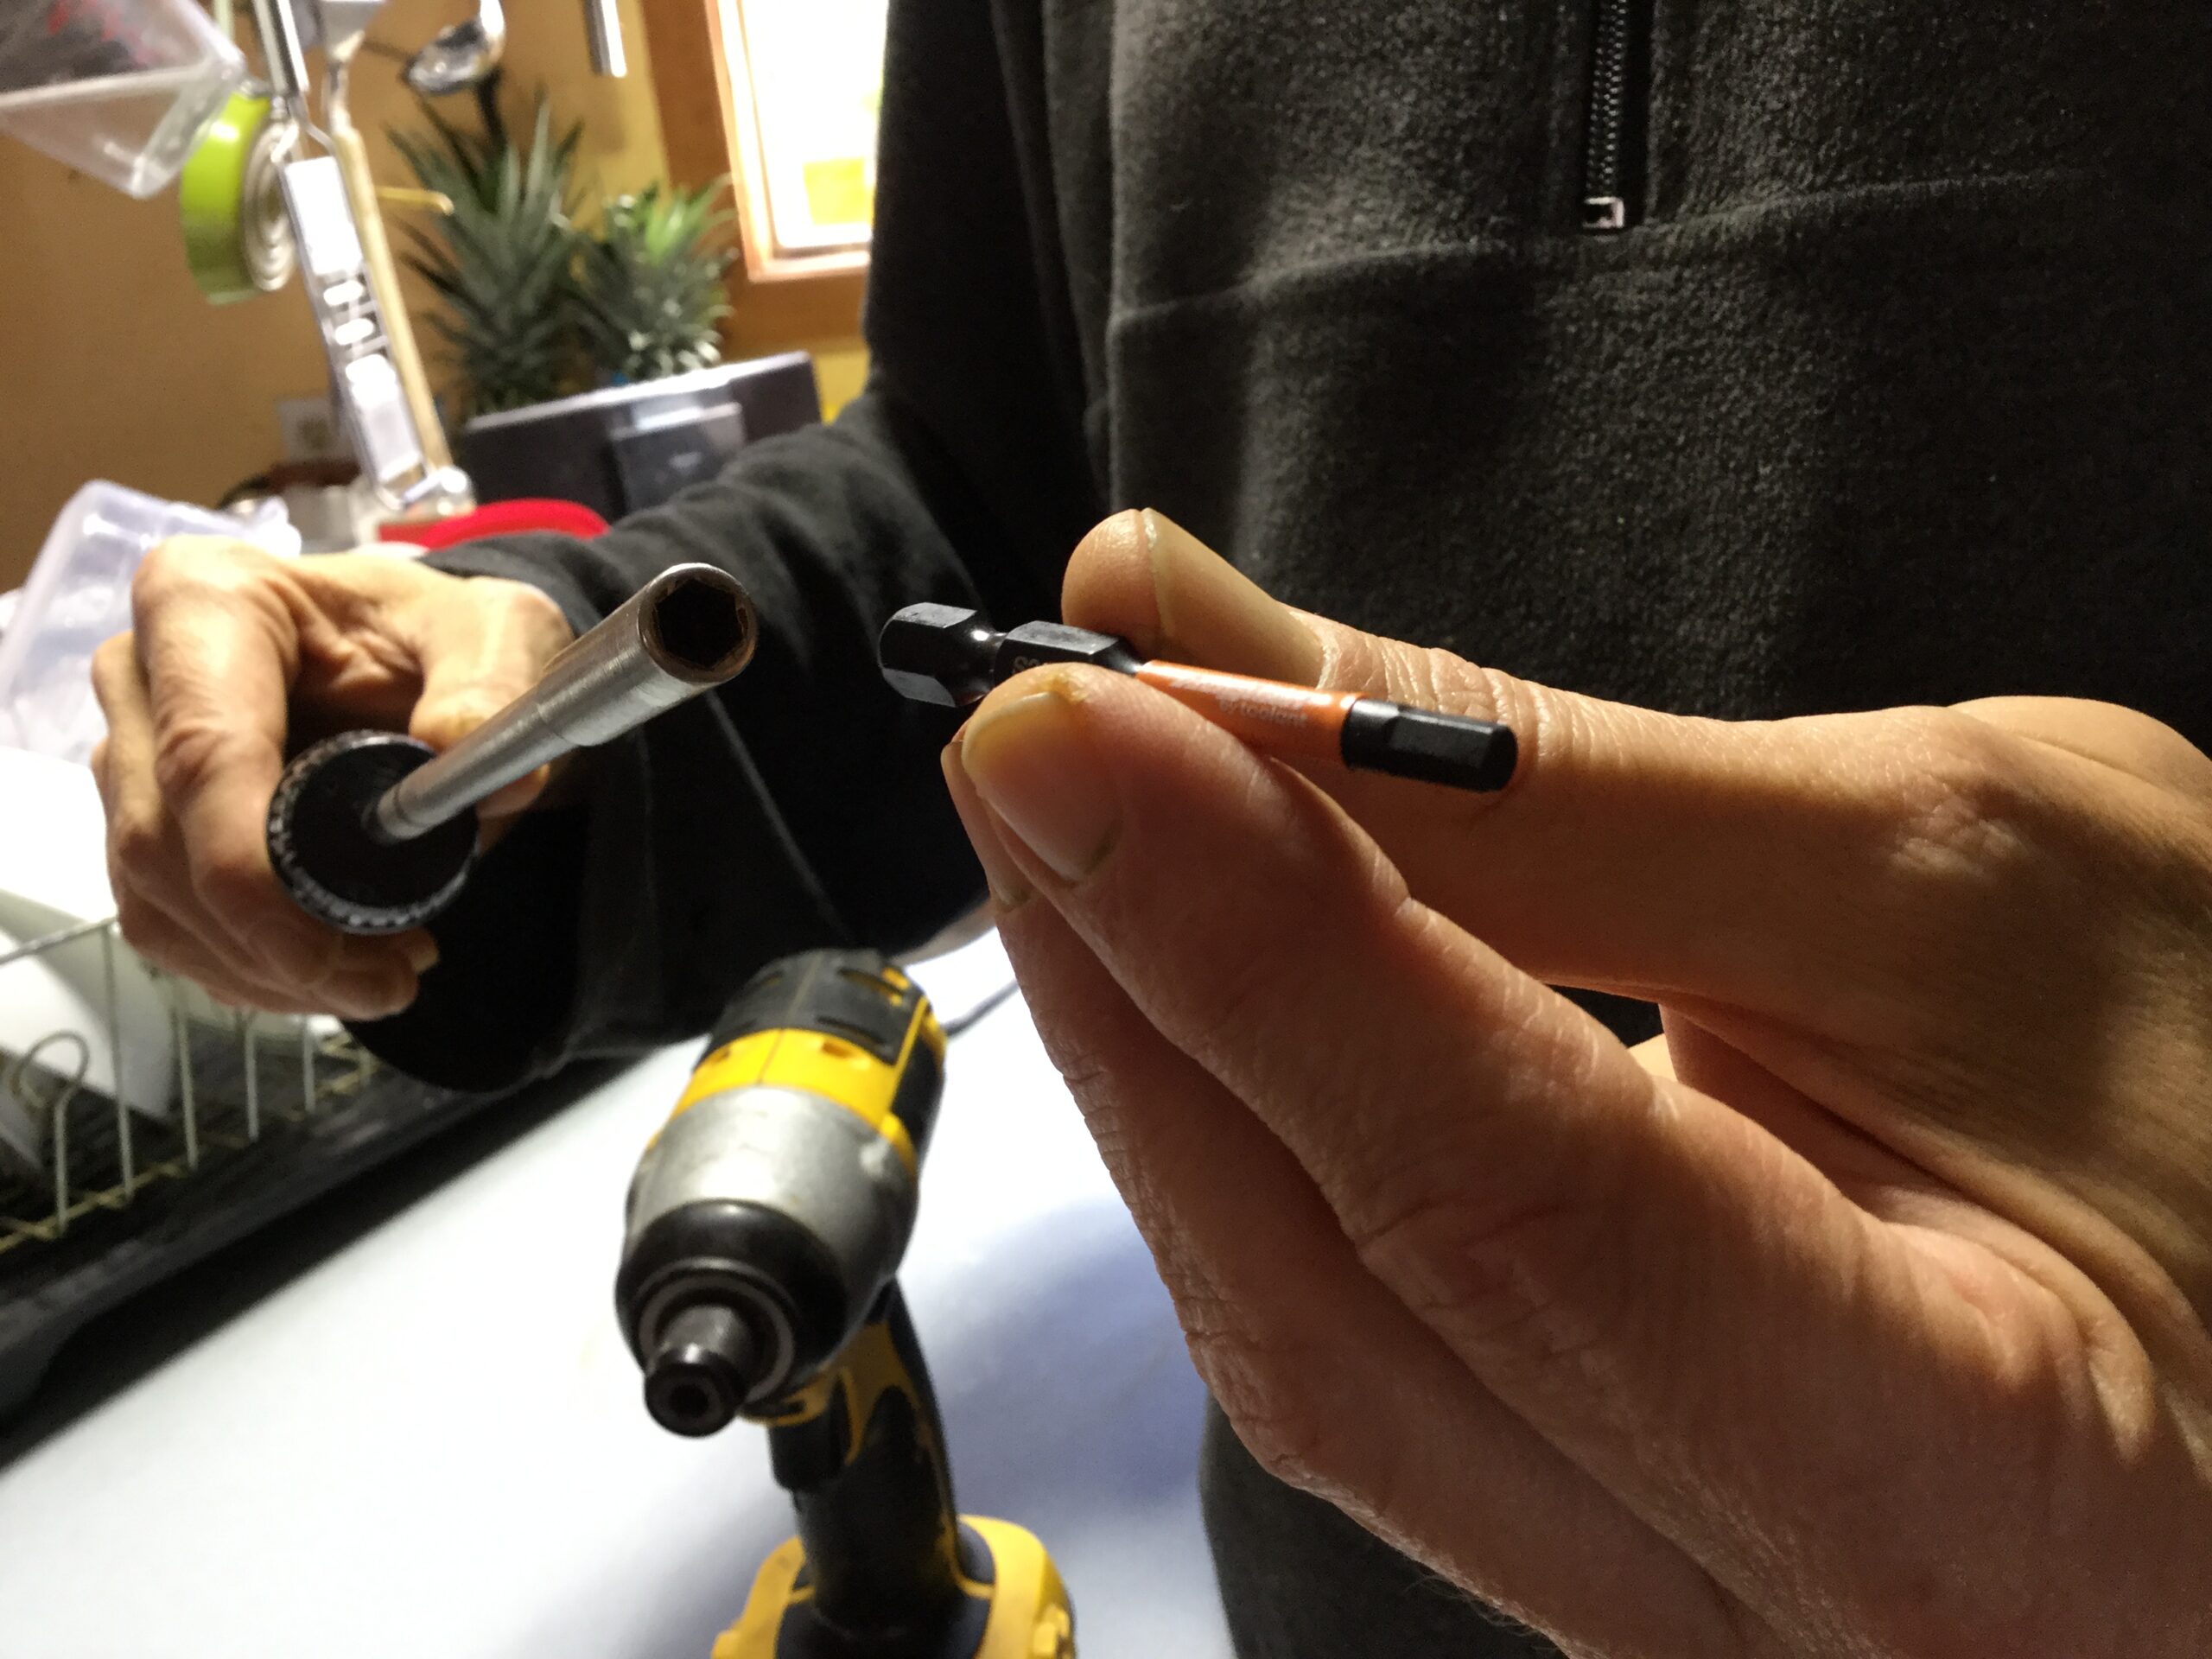
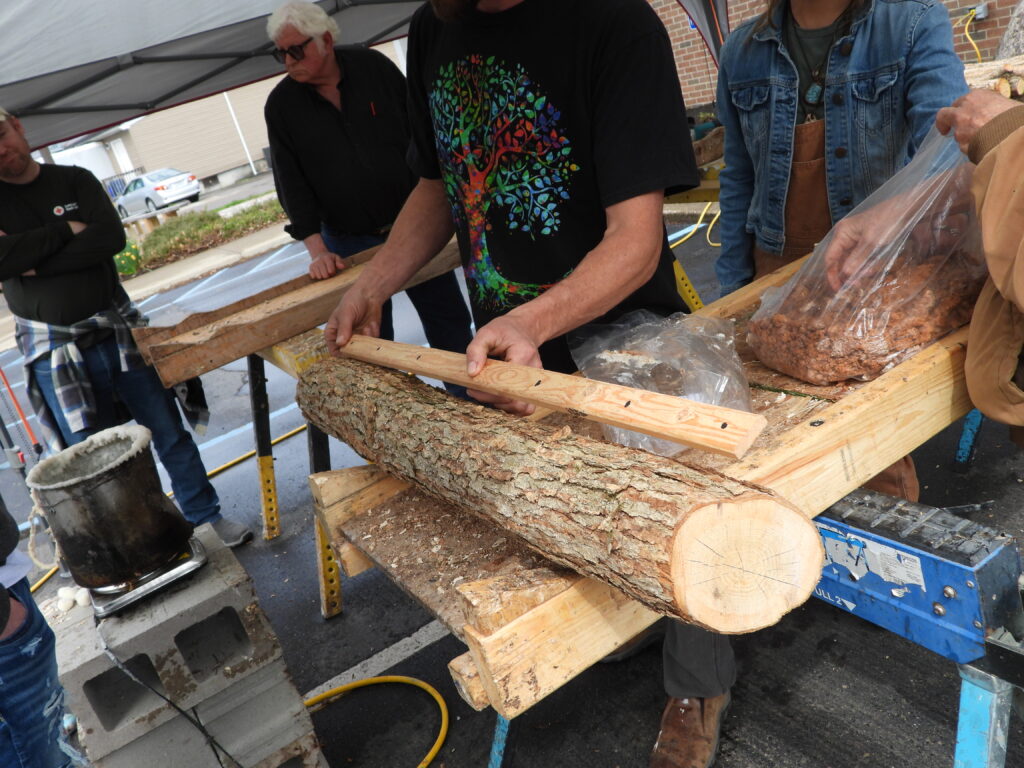
After the holes are drilled, it’s time to insert the spawn. Sawdust spawn comes in a block like the one shown above. You break it up with your hands then scoop some of the loose sawdust out into an empty yogurt container (or something similar).

Inoculating a mushroom log

Waxing a mushroom log
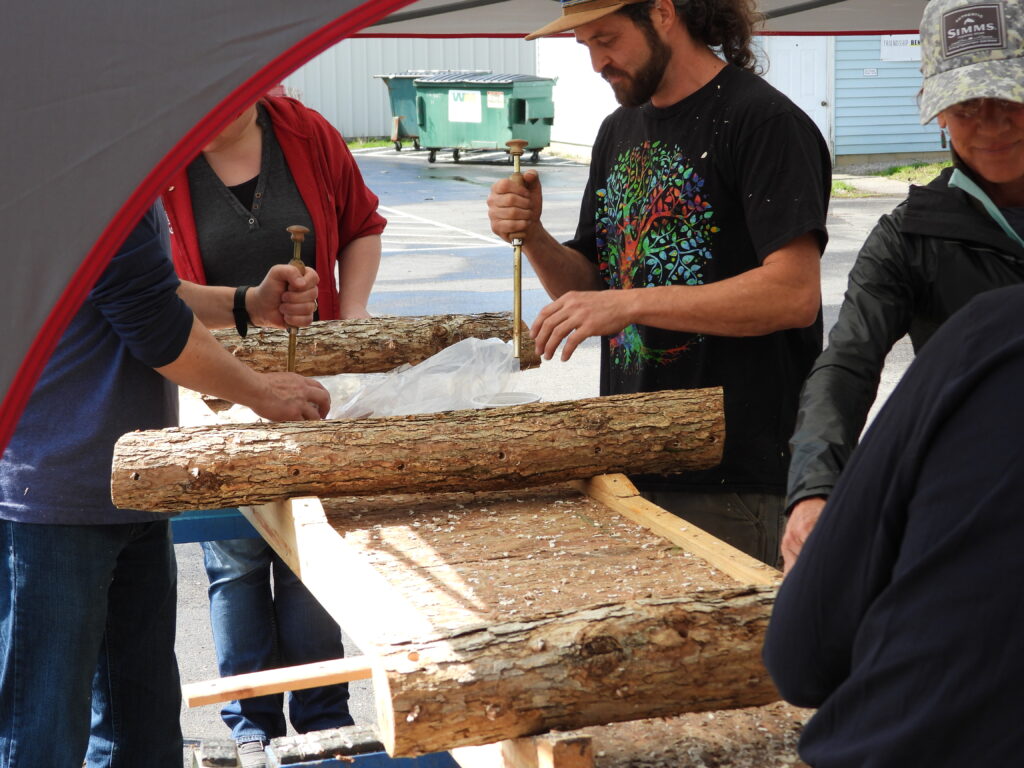
Next, bang the inoculation tool into the container a few times to fill it with spawn. Place the tool over the hole and depress the button at the top to insert spawn. The goal is for the spawn to fill the hole up to about the bark level.

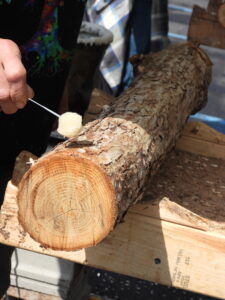
After that, all you need to do is wax over each spawn-filled hole. In the past, we’ve used beeswax from local hives, but apparently any food-safe wax works. Our teachers were using paraffin, melted then daubed on with cute little brushes. But they mentioned that there’s a new kind of wax, primarily used with plug spawn, that you can wipe on cold with your finger.

After that, it’s the usual waiting game (with the side note that, since we now live in an area with less extreme precipitation than we used to be located, we need to remember to water our log if we don’t get at least an inch of rain per week).

We haven’t had productive mushroom logs since moving to Ohio, but remembering how fun and easy inoculation was put the process back on my radar. Maybe next year we’ll push wildcrafting mushrooms onto the back burner and inoculate more logs.


About our teachers

Soulshine Acres mushrooms

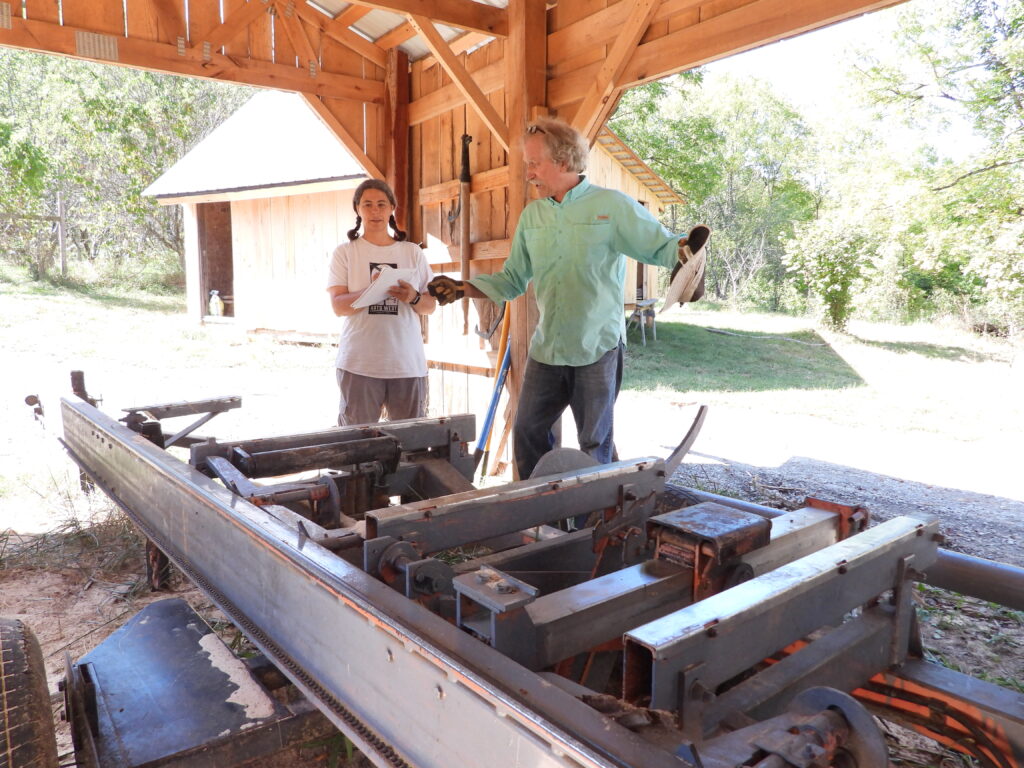
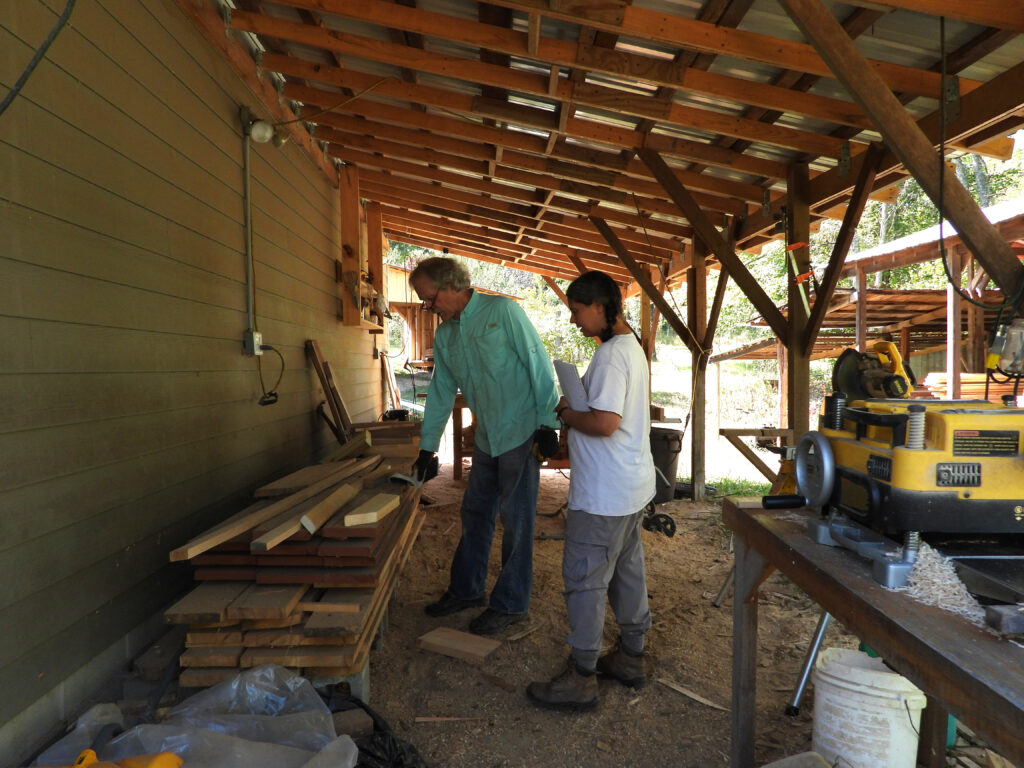
I want to end with a huge thank you to Soulshine Acres for sharing their expertise with us. They’re a frequent vendor at the Athens, Ohio, farmer’s market if you want to check some of their mushrooms out. Or just follow them on instagram using the link above to learn about their forest farm, full of over 400 mushroom logs.

Posted on

Shitake log inoculation video

Drilling holes in mushroom logs just got a lot easier and faster with this new shitake drill bit.

You will also need the angle grinder drill chuck adapter.

More details from a shitake log workshop will be ready for next week.


Posted on

Hex head drill bits

These new hex head allen wrench bits are miles ahead of the old L shaped wrenches.

They slide right into any impact driver with a 1/4 inch quick connect or the same size hand driver.

A nice bonus is these are magnetic to help you hold whatever bolt or screw you’re working with.

Posted on

Kindling splitter update

We’ve had our Kindling Splitter for over 2 years now and it continues to make kindling safe and easy.

It seems to help to cut your pieces a few inches higher than the height of the splitter.

Cutting shorter pieces runs the risk of the hammer contacting the splitter and dulling the edge.

A few minutes with an angle grinder is all it takes to bring it back to its full cutting potential.

Posted on

How to cut fiberglass insulation

I learned the hard way during some recent insulation work that a pair of scissors is painful.

The standard method of using a utility knife on a hard surface is good if you have plenty of room.

An electric meat carving knife is much better and quicker. It’s light enough to use with one hand while you use the other hand to hold on to the insulation.

Posted on

Four tips for sawing your own lumber

Backyard sawmill

When Mark and I went to pick up more waste slabs of lumber for firewood, I talked our neighbor into letting me pick his brain about what it’s like to own a homestead-scale sawmill. I figured several of you might dream of setting up your own operation, so here are his top tips:


Don’t expect to make a profit.

Wooden octopus

Richard admitted that he started out trying to pay back the cost of the sawmill selling beautiful wood products. However, he soon decided the sawmill was better as a hobby rather than a business.

The biggest benefit he finds to sawing his own lumber is being able to save live edges and be an artist in a way you can’t when working with industrial wood. It’s also a plus that the sawmill allowed him to build most of the required infrastructure. Speaking of which…


You’ll always need more space under roof.

Sawmill shed

The sawmill itself, of course, requires a shed.

Lumber drying shed

Then there are the boards, which need to be stacked in a drying building for a year per inch of thickness. (Be sure to plan the length of this shed around the length of the boards you intend to mill if you’re going for peak efficiency.)

Board planing area

Next up, there’s the planing area, which Richard prefers to keep in the open air but still under roof to prevent dealing with massive amounts of sawdust inside.

Woodworker's shop

Finally, he has a workshop where he turns homemade boards into stunning works of art. He’s also been known to utilize the local makerspace when he doesn’t have all of the tools he needs at home.


Plan uses for the waste products.

Homemade butcher blocks

Richard told me that most new sawmill owners probably get started thinking of the beautiful things they can create. But it’s also essential to plan for the inevitable waste products.

In addition to the slabs he gives to us for firewood, Richard turns his massive pile of wood shavings into top-notch mulch in the garden. Next, he uses small pieces of wood to create cutting boards and butcher blocks, arranging different colors and patterns to create works of art.

In the end, there’s actually not as much waste as you’d think when you try to use every part of the log.


Find a way to entice your spouse with the output.

Woodwork artistry

Finally, Richard mentioned that owning a sawmill can be an expensive, noisy, space-consuming hobby, so it’s essential to get the whole team on board. He won his wife over by using the wood to create beautiful interior furnishings, by donating finished products to be auctioned off for a cause they both believe in, and by creating lots of gifts that build connections with family and friends.

Posted on

A solar flashlight that actually works

Old solar flashlight

In 2012, Mark and I invested in two solar flashlights for camping and power outages. They lasted an amazingly long time, but eventually the batteries stopped holding a charge. Rather than crack open the plastic to try to replace the batteries, I decided to see how much a decade has improved the technology.

TOMETC solar flashlight

After poking around on Amazon for a while, I settled on the TOMETC Solar Power Bank. It had a lot of good reviews, a large battery capacity, and a large solar panel…all for under twenty bucks. Sounds like a winner, right?

Wrong! I’m guessing something about the frosting they put over the solar panel to waterproof it blocks light. Whatever the reason, two full days in the sun resulted in absolutely no change in the charge level of the battery. When I dug deeper into the reviews, it turned out I wasn’t the only one who had this problem, so it wasn’t a defective unit.

Meanwhile, the flashlight is way too bright for what I usually use it for (reading in my tent). An overpowered light drains the battery faster than it should. I estimate I got about eight hours of use out of a full charge. To cut a long story short, I sent this one back.

HybridLight Journey 300 flashlight

Next up, I decided to return to the model that served us so well for eleven years. Unfortunately, the original flashlight had been discontinued, but HybridLight has a replacement available. Their offering doesn’t look as flashy as some of the alternatives and costs $10 more than the competition. But they wisely included the option of a low-light setting so I won’t drain the battery bank too quickly while reading and their longevity track record speaks for itself.

How did the actual flashlight do in the field? I wasn’t as thrilled as I’d hoped to be. On low, I estimate I’ll get about twelve hours of use out of a full charge, far less than the fifty hours they promise but still better than the competition. Meanwhile, a day in the sun did little to top the battery up.

I’m starting to suspect that my goal — being able to set a flashlight in the sun for the day then read for a couple of hours at night using that solar energy — is a pipe dream. But perhaps I just haven’t found the right solar flashlight yet. Have you tried a different model with better results?

(For the record, I decided to keep the HybridLight flashlight. It works well charged from the wall and will presumably help us through power outages if left in the sun to trickle charge when grid electricity is available.)


Posted on

12 cubic feet steel dump cart choices

Anna and I assembled a Craftsman steel dump cart while visiting my Mom recently.

The book says it takes 45 minutes to put together but we needed nearly 2 hours.

It’s a solid cart that can handle 750 pounds. Lowes sells it for 350 but Menards has a Yardworks version that is a little over 200.


Posted on

Kohl Wheelbarrow update details

Some of the problems with restoring a wheelbarrow is the damage around bolt holes which prevents the round headed bolts from biting in so you can tighten them.

An exterior screw with a washer isn’t exactly flat but it seemed better than a traditional nut and fastened in nicely with the wood of the handles.

Zip ties helped me hold it all together without needing a second hand while I tightened everything down.

Posted on

Kohl wheelbarrow demise

What about the Kohl lifetime warranty?

Not so fast. Kohl tools have a generous lifetime warranty but Kohl products do not.

They still sell the same 6 cubic feet Kohl model…now it’s 179 dollars.

Wooden replacement handles are 19 dollars which hopefully will give us many more years of hauling.