Posted on

SharkBite connectors for amateur plumbers

Fixing a plumbing leak behind a washing meachine

We got a good deal on our current trailer in part because the pipes had been allowed to freeze over the winter. Our first round of plumbing repairs seems to have held up great, but a new leak popped up behind the washing machine recently.

I love small spaces and Mark hates small spaces, but he’s the DIY pro while I’m a rank amateur. So he figured it was worth splurging on two SharkBite connectors to turn the project into child’s play.

This child didn’t push the new pipe into the top of the bottom connector hard enough the first time, so I got a big spray of water in my face. But a little more elbow grease did the job and, in the end, I was very proud of my accomplishment.

Posted on

Harvesting the first hairy vetch for mulch

Hairy vetch starting to bloom

Remember my disappointment in summer-planted hairy vetch? Well, that patch kept growing slowly throughout the fall and winter, then took off like a rocket this spring. I needed some mulch this week and didn’t mind the vetch bed staying in cover crops for another year, so I actually cut when only the first few blooms had appeared. Harvest was extremely simple — a lot of stalks ripped out easily by hand then I used a toothed sickle to cut through the rest.

Rolling a ball of vetch

For the first bed that was entirely vetch, I rolled my cut cover crops up into a big snowball of greenery and pushed them down the hill to the broccoli, who have been treated with worm castings but still need more nitrogen (plus mulch). The vetch covered up an area about three times as large as the original spot it had been harvested from, although we’ll see how much the greenery melts down as the stems die and dry.


Co-planting rye and vetch

Vetch and rye cover crop coplanting experiment

Next up was taking a look at a rye-and-vetch co-planting. Like the other vetch bed, this patch of garden soil needs serious improvement (thus the focus on a nitrogen-fixer like vetch). Unlike that other bed, I planted in fall instead of summer.

In this area, I wanted to determine which did better — rye planted solo or rye interplanted with vetch. So I divided the bed up into stripes, the first one vetch and rye, the next one rye only, etc. The idea is to make sure any difference I saw between plantings wasn’t due to the part of bed they were planted in.

Conclusions? First of all, it’s clear that rye does much better in excellent soil than it does in poor soil. When we’d planted it in Virginia, our rye used to grow to my shoulder. These beds barely make it to my waist.

The vetch, in contrast, did quite well here (although only about 60% as well as the summer-planted vetch-only bed). The bands with vetch produced about twice as much total biomass as the rye-only bands did. Would a vetch-only band have produced yet more? Hard to say since my vetch-only bed was planted earlier in the season than the rye-and-vetch bands. Sounds like we’re due for another experiment this fall.


Moving hand-harvested mulch around

Homegrown garden mulch carrier

As a side note, the firewood tote carrier we no longer use turns out to be awesome for moving cover crop mulch around. If you’re hand harvesting, you can lay clumps into the carrier as you cut them, then the tote bundles them up nicely as you wander across the garden.

Homegrown garden mulch

And here’s about a third of the area I mulched with handcut cover crops over the course of a bit over an hour. Yes, I did yank up blooming arugula and cut some comfrey leaves also to round things out. I’m now tuckered out but very pleased with my free mulch.

Posted on

Growing and cooking homegrown asparagus

It’s asparagus season and high time for an asparagus post! I’m not going to regurgitate the information you can find in any book or website about giving your plants a few years to get their feet under them before starting to harvest, keeping the weeds at bay, etc., though. Instead, I thought I’d share a few observations I’ve made over the last decade plus of growing our own asparagus then gorging on the harvest.

Handful of asparagus

Our favorite variety

Don’t buy purple asparagus expecting it to look pretty on your plate. As soon as you cook them, purple spears turn green.

But do plant Purple Passion! Mark’s mom gave us five plants the same year we planted our main patch and they’ve turned out to be the earliest producers and the heaviest producers in our garden.


Early harvests

For the earliest harvests, rake back the mulch and any top-dressed compost a couple of weeks before you expect to see spears. This will let the ground warm faster and will buy you perhaps a week over your non-raking neighbors’ plots.

Of course, that opens you up to freeze damage which will melt your delicious veggies into goo. So, when you expect a freeze, head out and pick every spear in sight. Well, almost every spear. If an asparagus plant is less than three inches tall, I’ll instead take a leaf from my mom’s book and drop a handful of that raked-off mulch back over top for freeze protection. No need to remove it after freeze danger passes either. Pointy asparagus will push right on through.


Cutting up asparagus

Delectable roast asparagus

Unlike grocery-store asparagus, ours tends to come out of the garden with some tiny spears and some huge spears. If they go into the oven all different sizes, the smallest spears will burn before the bigger ones turn sweet. So if you’re like us and crave the caramelized sweetness of asparagus roasted in olive oil until the edges go brown, be sure to cut up your spears to make them evenly sized.

That’s all there is to years of delicious harvests. Enjoy what we consider one of the easiest and most dependable crops!

Posted on

Should you plant your spring garden early?

Water droplets on a pepper leaf

I don’t have a plant problem…yet.

Potting up spring seedlings

But I did pot up my indoor seedling shelf (left photo) into an outdoor seedling table (right photo) this afternoon. Which will be great…until the next low in the 30s, forecast to show up in six short days.

Broccoli seedlings

The reason for all this potting up is that I started some of my seedlings — peppers, tomatoes, and the first round of cucumbers — earlier than usual this year. That means they need to be potted up and/or put into the ground earlier than usual. I’m on the fence about how smart it is to really push the spring garden envelope this way, so I’m doing a side-by-side comparison in my broccoli beds.

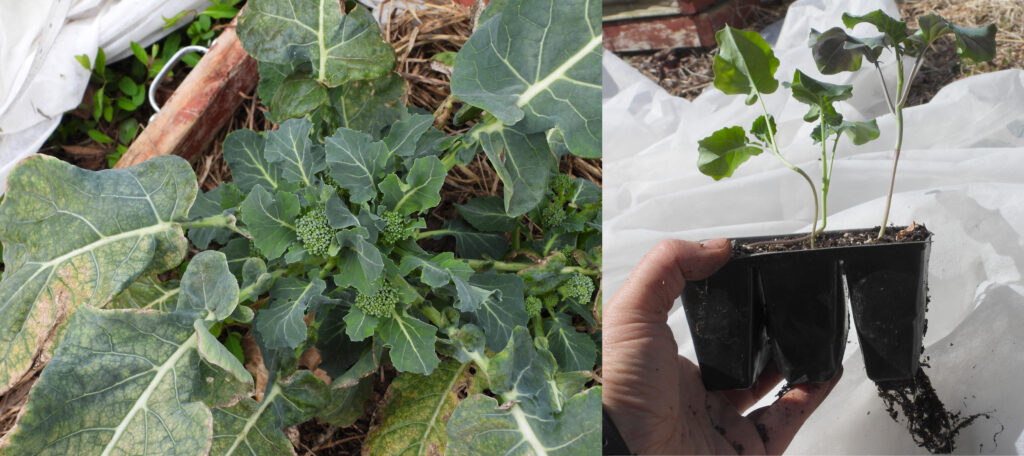
The broccoli story began when I set out most of my broccoli seedlings on March 21, covered them up during a cold spell that dropped into the high 20s, and watched what always happens happen again. The broccoli plants got a little nipped but not so bad that they won’t produce.

Meanwhile, I had another eight plants that I wasn’t able to fit into the designated space, which I kept inside for an extra two weeks. The indoor plants quickly outpaced the outdoor plants in size and I thought to myself, “Why not rip out some of the outdoor plants and replace them with bigger indoor plants to see whether I would have been better off not jumping the gun?” On April 3, the second round of plants went into the ground.

In the photo above, one of the indoor-longer plants is on the left. On the right is the outdoor-longer plant I’d just pulled out. I’ll try to remember to make another post in a month or two once it becomes clear which set of plants is doing best.

First asparagus and garden cat

In other garden news, we picked our first three asparagus spears Sunday! Dandelion, our garden guardian, predicts many more will head into our bellies soon.

How’s your garden growing?

Posted on

The best time to prune raspberries and blackberries

Pruning raspberries

I’ve pruned our black raspberries, everbearing red raspberries, and blackberries in spring, summer, and winter and the plants really don’t seem to care what the calendar said. So nowadays I prune at a time that works for me.

In my opinion, the toughest part of pruning brambles that have primocanes and floricanes is figuring out which canes have gone through their two-year cycle and are dead. Second toughest is figuring out where the dead tops of everbearing raspberries start.

The solution to both of these puzzles is to wait and prune once the leaf buds have started expanding. At that point, it’s obvious at a glance which canes (or parts of canes) are alive or dead.

The bonus of pruning at this time of year is that it gives you an excuse to be out in the garden on stunning days without encouraging you to plant annual crops too early. (This is a case of do as I say, not as I do — we already have lettuce and peas and parsley and broccoli in the ground. Most of it is sitting there giving me the stinkeye for planting too soon!)


Soil-first gardeningOn an unrelated note, Mark and I just added half an hour of cover-crop content to our Soil-First Gardening course. If you already own a copy, you can simply log in and enjoy the new videos. If you haven’t grabbed your copy yet, now’s a great time since you can use this coupon link to get 67% off through April 1. Enjoy!


Posted on

New chicken books

Proof copies of chicken books

Do you have friends jumping on the chicken bandwagon this spring? Then I hope you’ll point them toward my Getting Started With Your Working Chicken, entirely free in ebook form and dirt cheap even as a (brand new!) paperback. I think of this title as a bit like the bare-basics books at pet stores intended for folks impulse buying a new type of animal. The goal is to bring new chicken keepers up to speed in half an hour so they don’t get overwhelmed by the deluge of options right off the bat.

Want to help me out by spreading the word about the paperback release (and possibly win a copy)? You can enter our rafflecopter giveaway here.

Building a DIY Chicken Waterer

Adding a clear roof over a planter boxMeanwhile, we’ve been hard at work coming up with a new ebook in the Permaculture Chicken series. Building a DIY Chicken Waterer will launch next month, and you can preorder the ebook for a buck off. (There will be a paperback too, but I’m still working on it. As you can likely tell, the font size needs increased. Stay tuned for a preorder announcement soon!)

And, finally, the third chicken book on my plate this year is an update to Thrifty Chicken Breeds. Want to share your wisdom and win a free copy of the ebook? Just comment below with your favorite breed(s), a photo (which can be emailed to anna@kitenet.net if it’s hard to leave in the comment), and a short writeup of why you prefer the one(s) you prefer. If I use your info, you’ll get a free copy of the revised ebook once it’s ready to go.

(Oh, and in case you’re curious what Mark’s up to this photo, it has nothing to do with chickens. He’s adding a clear roof to his newest porch planter box to prevent roof runoff from swamping our crops. I’m hoping this will also make for an even lower-blight situation for tomatoes this summer. Stay tuned to find out if it works!)

DIY chicken waterers

Update: Building a DIY Chicken Waterer is now live in print and available to preorder as an ebook!

Posted on

Jumping the gun on the garden year

Lettuce seedlings

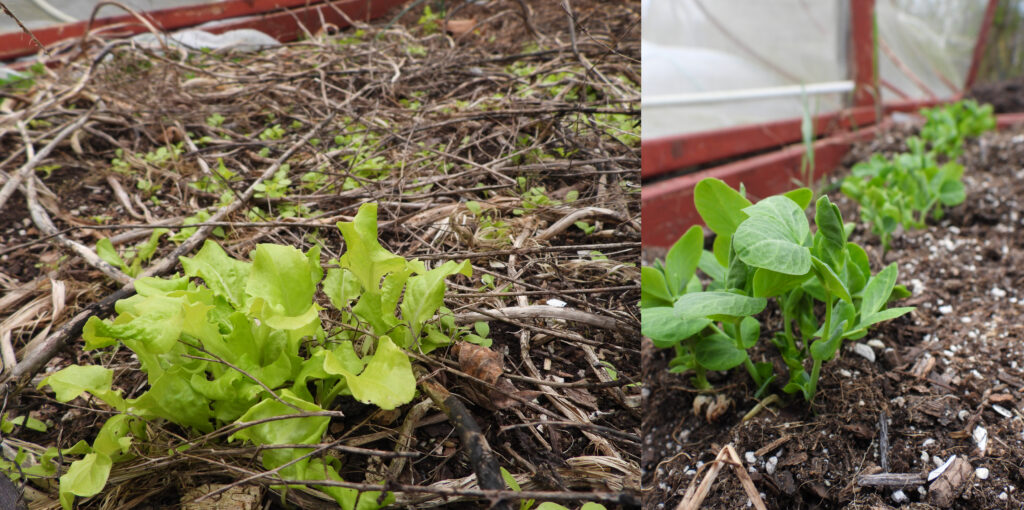
I like to direct-seed leaf lettuce under a row-cover-coated caterpillar tunnel in early February, a holdover from gardening half a zone warmer than where we are now. Most years, those early lettuce either don’t sprout or sprout and perish. This year is the outlier that makes me keep jumping the gun. Lettuce planted on Valentine’s Day is well established now at the end of the month.

Starting vegetable seedlings inside

Meanwhile, the more dependable way to get a jumpstart on the garden year in our climate is by starting seedlings inside. I usually go for all-in-one flats, but Mark bought me a bunch of smaller containers that fit into a flat and I’m getting a lot out of the mix-and-match approach. This way, I can start a flat of veggies that germinate at different rates, leaving the slow germinaters (like parsley) behind under cover while pulling out the fast germinaters (like broccoli). Then I can start more seedlings to fill in gaps atop that all-important heat pad.

Transplanting peas into a porch planter box

I’ve even gotten into starting peas inside, but those I do in fifty-section flats because the seedlings have to be set out as soon as the tops are up. Here, I’m planting the first flat into Mark’s porch raised bed.

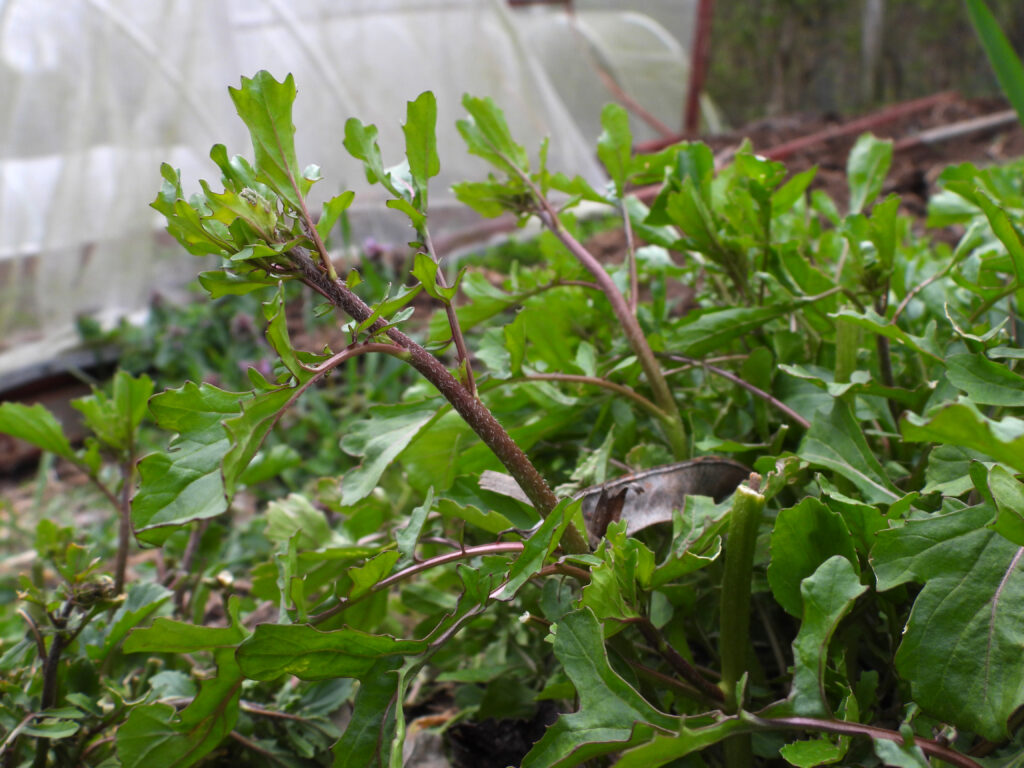
Overwintered arugula

Seedlings are fun, but what about goodies we can eat right now? Most years are so cold up here that, even under cover, leafy greens perish before spring. This winter, in contrast was mild by our standards. A few kale plants are hanging on under the row covers while uncovered arugula is already growing and putting up flower heads. Looks like we’re having sauteed arugula for dinner!

What’s going on in your garden?


Posted on

Overwintering a garden under a solar pool cover

Using a solar pool cover on a garden

If you have a solar pool cover lying around unused, it might be worth using to preheat your garden soil. We had the pleasure of seeing one in action this past weekend…

Soil temperature under pool cover and in the regular garden

…and were impressed by the results. Under the pool cover, soil was 43 degrees on an overcast day. Outside, the soil in an otherwise-identical raised bed was 39 degrees.

Is that enough extra warmth to start your spring crops now? I’ve always tried to jump the gun using the absolutely minimum germination temperatures. Based on that, the soil under the pool cover is warm enough for most spring crops.

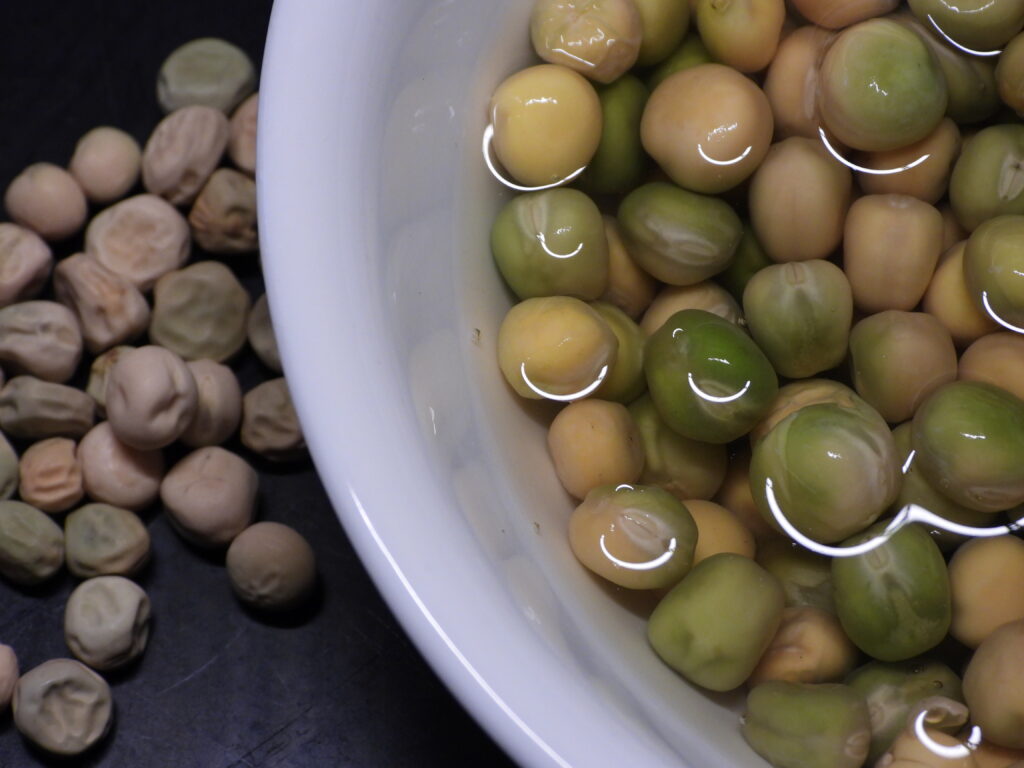
However, I generally get very spotty germination when I plant so early. No wonder since, I learned this week, peas planted at 42 degrees will take 36 days to germinate!

Speed of germination at various temperatures
Source: https://sacmg.ucanr.edu/files/164220.pdf

We’ve gotten into starting unconventional seedlings inside as a result, but more on that in a later post. For now, that old truism about planting peas on Valentine’s Day — we won’t.

Posted on

New garden varieties for 2023

Experimental crops for 2023The seed rush has started! My calendar tells me to start the first lettuce outside if the ground is warm enough on February 2 (which it almost never is up here) and the first broccoli inside on February 14. But Mark asked me to try romaine lettuce this year, which seemed like an excuse to go ahead and start a few lettuce seedlings along with the first flat of broccoli seedlings on January 30. I couldn’t help myself!

As usual, we’re trying a small selection of new varieties along with our tried-and-true and I thought you might like to see our experiments. We get our seeds from Johnny’s because their plants are (almost) always both productive and delicious, so you can find all of these goodies over there if you want to follow suit. I will admit that their seeds aren’t cheap, but I find that I get so much more out of each plant that it’s worth the extra cash, especially once you factor in time spent taking care of crops that don’t bear.

So, without further ado, four experiments!

Quirk produces tiny cucumbers that were just too cute to pass by when I saw them on the website.

Sunland is a run-of-the-mill romaine, but we’ve never grown romaine before so I’m adding it to the list. We’ll be starting a few seeds every week then transplanting them the way you would broccoli, a different technique than our dependable direct-seed-a-bed-a-month technique formerly used for leaf lettuce.

Adam Gherkin looks like a similar variety to my beloved Harmonie, which has been a delicious producer for years. Yes, 250 seeds is a lot, but the packet option just seemed too small. I can often eke out cucurbit seeds for two to four years, so if this variety is a winner that will only be $5 – $10 a year for our main cucumber crop.

Menuette is a new kind of parsley with very small, ferny leaves. We like to use parsley in tuna salad, but the bigger leaves tend to get tough in the summer. We’re hoping this variety will stay tender all year long.

How about you? Which new varieties are you most excited about trying? (I’m assuming your seeds are ordered, right?!)

Posted on

Turning a septic field into a wildflower meadow

When I mentioned not wanting to turn our septic field into the traditional mowed lawn, Travis Sparks wrote in to share his impressive mini-meadow, started in 2017 atop his Maine septic field.

First step turning a septic field into a wildflower meadow
“I mowed the area down as low as I could in late spring 2017,” he wrote, “spread a thin layer of compost over the whole area, broadcast a variety of both perennial and annual seed mixes over it, and lightly raked everything. I mowed it a couple more times that year (higher cut) to try to knock the competition back while things germinated, and then left it be.”

“I just had sparse grasses and wildflowers to start (nothing woody) before doing any of this, so the competition wasn’t too strong early on. It was reasonably successful the following year.” (Image above.)

Two year old septic field meadow
Travis wasn’t entirely thrilled with wildflower establishment, though, so he repeated the process in late spring 2019 including “another very light top-dressing of compost since the leach field soil is mostly just sandy fill.” The results that year were even more inspiring as you can see in the photo above.

Four year old septic field meadow
And here’s the meadow at four years old, in 2021. Travis wrote that after the establishment phase, he hasn’t done anything to keep the meadow on track (although I suspect he’ll have to mow now and then to keep woody plants out).

I’m so impressed by his success, which turns his septic field into habitat for pollinators and lots of other wildlife. Have you turned a blah septic field into an integral part of your homestead? If so, I’d love to hear about it!